


When was the last time you made something?
Gather, curate, and make a scrap paper journal with us! A low-effort way to find flow.

Do you save interesting scraps for collage, or want to start? Construction paper paintings sent home from day care? Shopping bags with interesting typography or design? Sturdy brown paper grocery bags? Wallpaper samples, old drawings or worksheets, manila paper torn sheets from magazines, graph paper, lined paper, lunch tabs, doilies, coffee filters, the list goes on…
When we collect materials for a creative experience, we like to think about how, not what. As in, how will the children be using the materials? Not what will they be making. Think cutting, tearing, mark-making, and attaching. Each child will approach the materials in their own way, and that’s a good thing. Our job is to make these materials available and accessible. One way we like to do this is with a collection of scrap papers on a collage cart. Sorted scrap papers on the top, scissors and gluesticks in the middle, and cardboard pieces to use as a surface on the bottom.
An even simpler idea? Just add a box of paper scraps in the art area, and children will find endless good uses for them.
Or! Make a scrap paper journal. Make them together with children, or make one just for you!
A scrap paper journal can serve many purposes:
Consider it a place to experiment and play. With so many different textures, weights, colors, and sizes, it can be an interesting way to test mark-making materials of all kinds. An oil pastel, for example, will behave differently on a toothy brown paper bag, a smooth vinyl wallpaper, or a crepey doily. How will watercolor or even just pencils work on all of these different papers?
Or, the scrap paper journal can be a more contained and curated way to offer collage. A few years ago, Bar made Calvin, Shannon’s son, a scrap paper journal that she sent in the mail. After carefully and thoughtfully flipping through all the different papers, Calvin envisioned a crown. He used scissors to cut strips, glued them together, measured his own head, and was so proud when the crown fit (see a video of the crown-making here). At this age, he was so very capable of executing an idea and allowing it to twist and turn as ideas typically do.
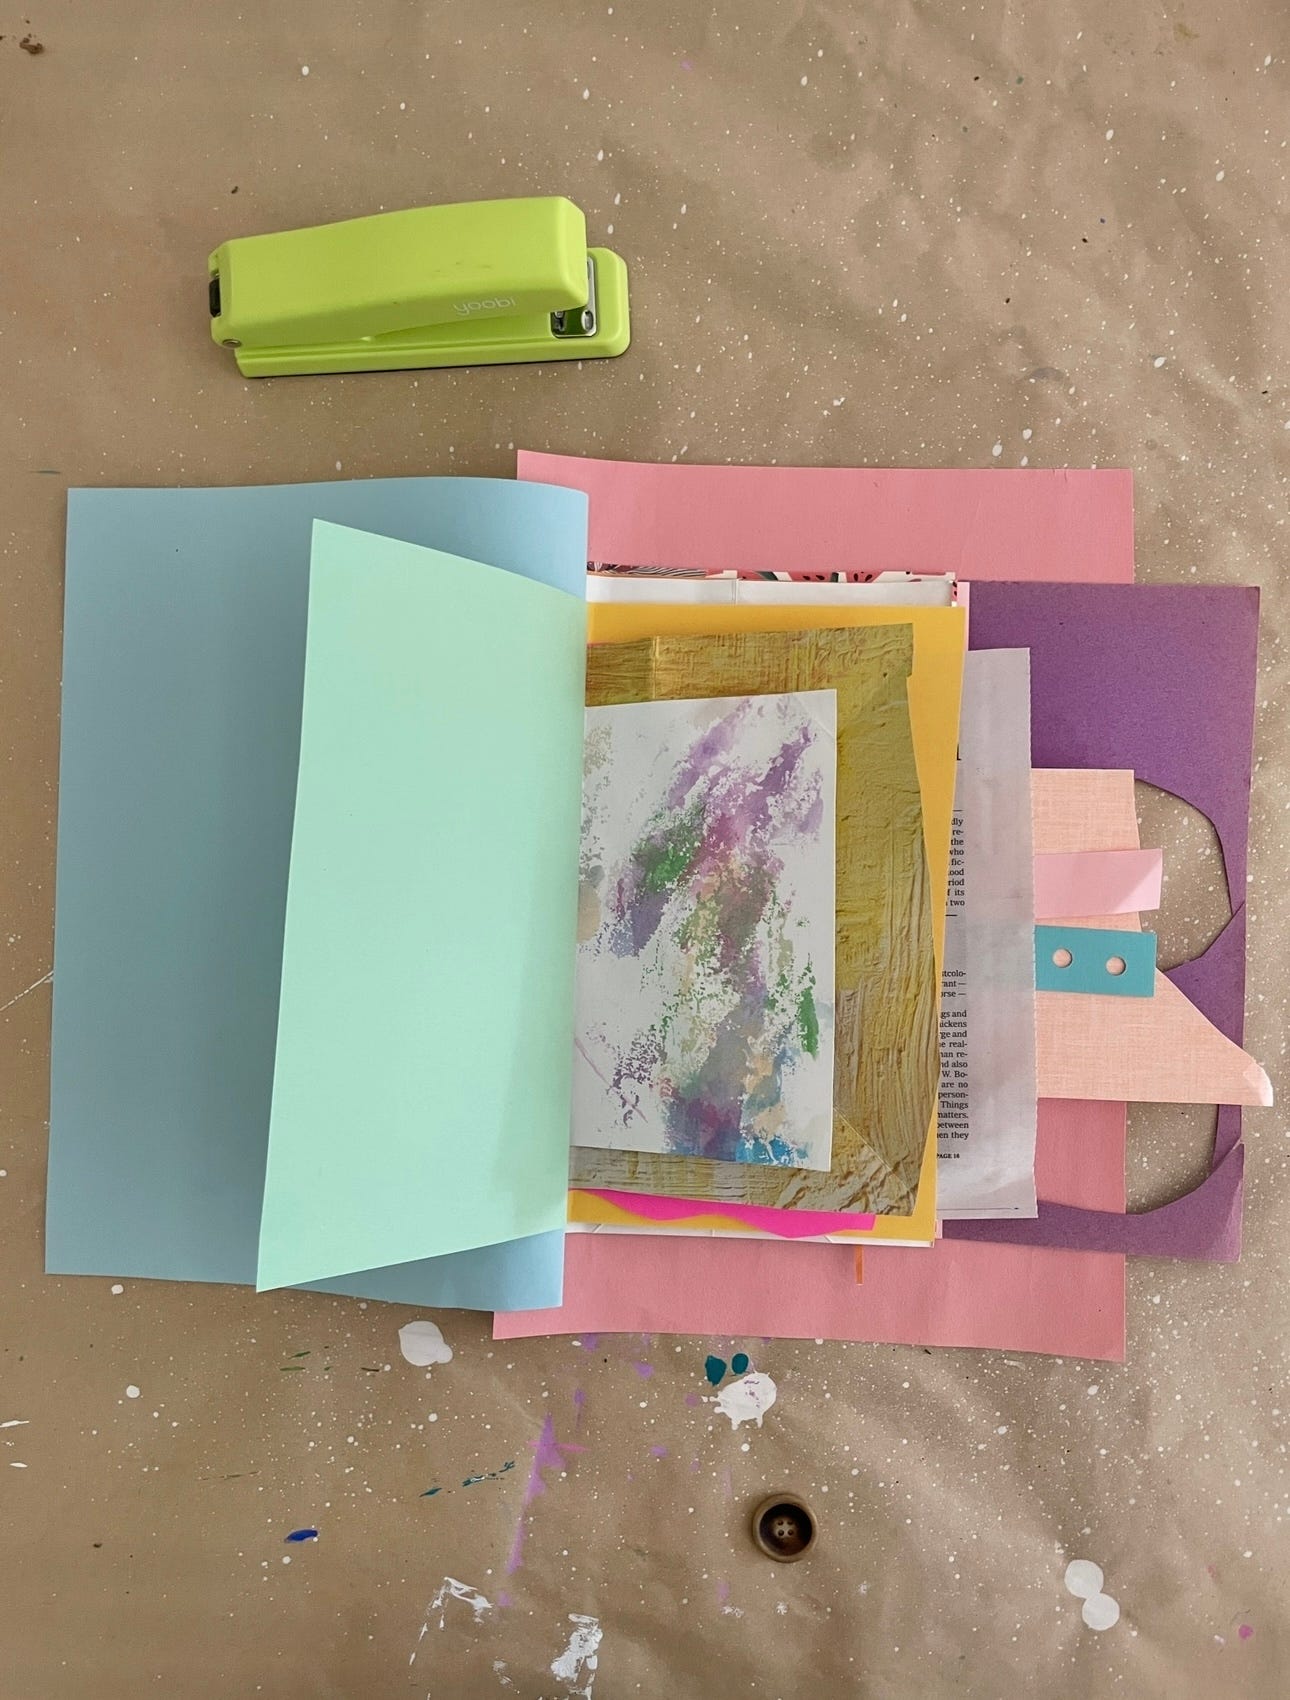
Making the scrap paper journal
Here’s how to make a scrap paper journal (Shannon made the mini-journals above!).
You’ll first need to curate a collection of interesting paper scraps and flat surfaces. Some might be whole sheets of paper, some might be scraps with cutouts, some might have interesting textures or patterns. You can include envelopes and small paper bags for tucking in little treasures, too. If you have a paper punch, add holes and texture that way as well.
Stack the scraps and even them up on one side, then staple them together. Cover the staples with a strip of masking tape on the front and back. If the scraps are not too thick and you have access to a sewing machine, try using a zig-zag stitch to bind the journal together (go slow so you don’t break a needle).
Present the journal to children with scissors, a glue stick, and some mark-making tools like paint sticks, oil pastels, or black Sharpies. Just set out the materials and see what happens!
See the possibilities in every scrap
We will always encourage you to see and imagine possibilities in everything you see and handle throughout the day. What kind of paper scraps come into your world that you could save? Here are some ideas we have for you…
Wallpaper
Wrapping paper
Shopping bags
Grocery bags
Lined paper
Graph paper
Wax paper
Scribbly artworks
Magazine tear-sheets
Newspaper
Manila folders
Cardstock
Grocery bags
Doilies
Xerox runoffs
Black and white photos on regular copy paper
Envelopes
Paper lunch bags
Notecards
Greeting Cards
Postcards
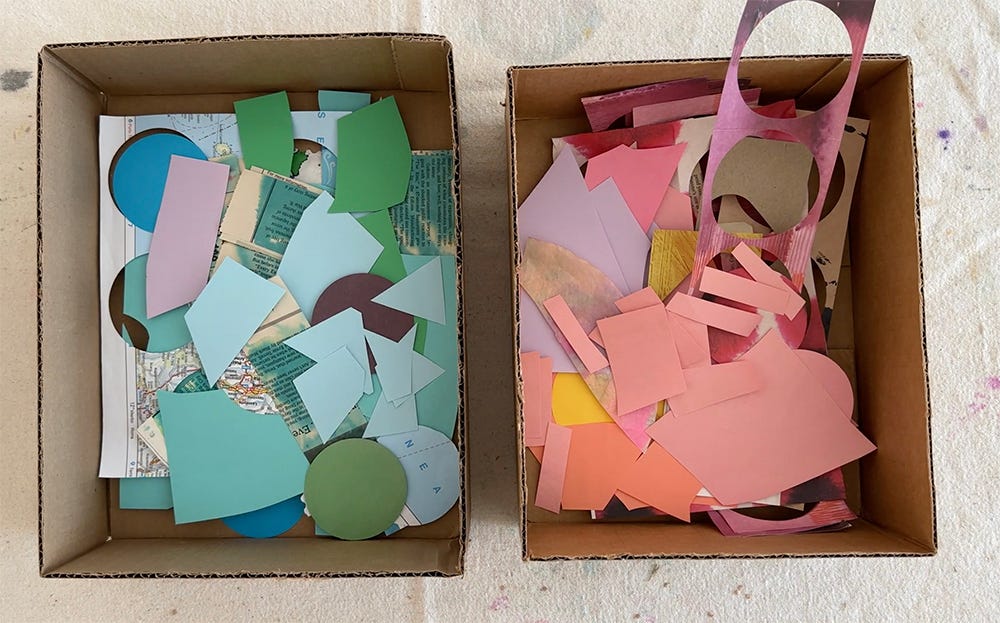
Another way to sort and organize.
One of our favorite ways to expose children to color theory is to separate materials into warm and cool families. Blue, green, turquoise, and yellow over here; red, pink, orange, and brown over there. Purples can go on either side, unless it’s periwinkle! This requires two boxes with sides cut down so that they feel like deep trays. Place them side by side in your art space, along with scissors, glue sticks, and easy surfaces. The warm and cool collage boxes also make cleaning up more interesting and engaging. Who can resist building their color sorting skills?
A quick note…
Starting next week, our free subscribers will have access to one full post per month, while our paid subscribers will be able to read all of our posts, participate in our community chat, and take part in some special upcoming events and bonuses that we don’t want you to miss.
We hope you have a good sense now of what we’ll share here—some theory and pedagogical discussion at the intersection of creativity and education; an exploration of practices, mindsets, and tools that support this work; favorite materials, environments, and experiences; and soon, interviews that expand on the notion that art is play and play is learning. We are so grateful for your support of this new endeavor and truly hope you’ll join us as a paid subscriber.
Love this! I actually made something yesterday after a bit of a break. I make collages and tear up old magazines and postcards. 🙃